


How to build microservices with Node.js
Jun 6th, 2021
Building applications is more than just meeting the client's needs. Due to the large system size, developers face various challenges, including the maintenance of the codebases, the implementation of new features, bug fixing, and managing user roles. At scale, these considerations are non-trivial, and developers have to use various methods when architecting systems to avoid them.
Monolithic applications commonly encounter these problems, and distributed systems are typically used to alleviate these issues. A distributed system consists of various components spread out over the network that function independently. A distributed application consists of several loosely coupled microservices that work together to meet the user’s needs.
In this article, we will demonstrate how to get started building microservices with Node.js.
Understanding microservices architecture and how they work
Microservices are an evolution of service-oriented architecture that structures an app as an assembly of standalone interconnected services that communicate via various network protocols such as HTTP. Today, most cloud-based apps that expose a REST / GraphQL interface are built using microservices.
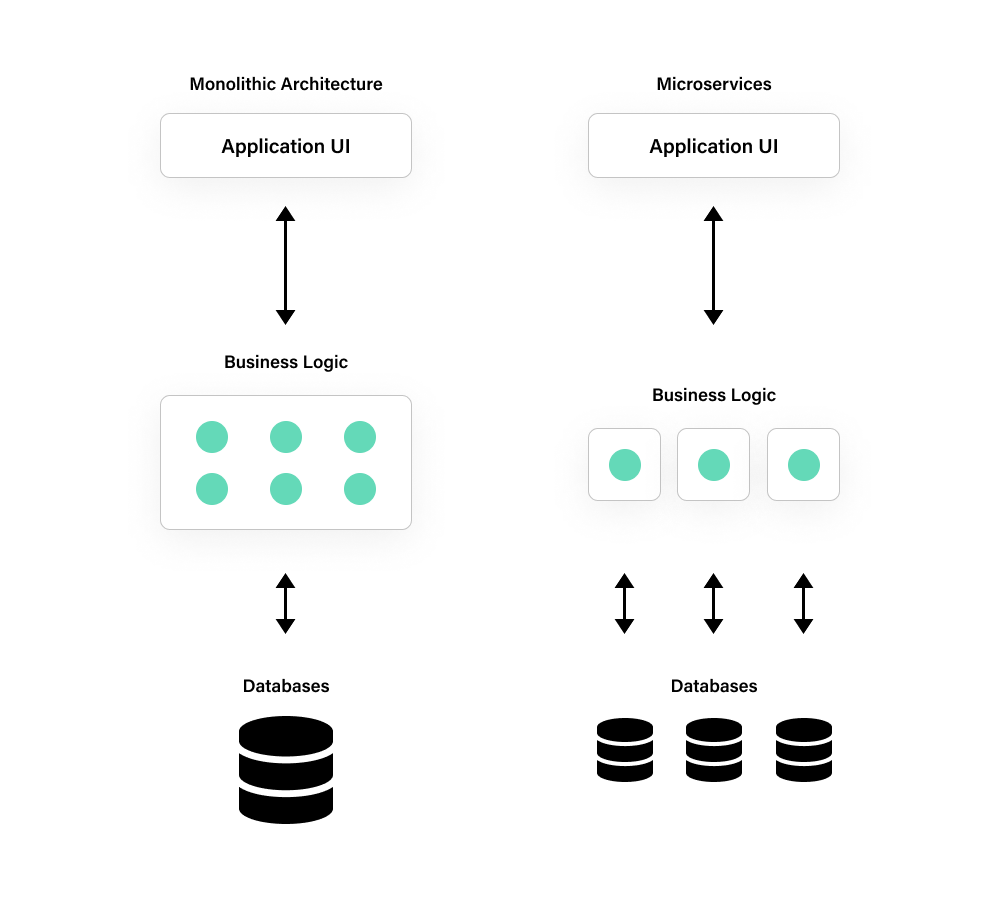
Image source: https://www.cuelogic.com/blog/microservices-with-node-js
Benefits of microservice architecture
Since microservices are loosely coupled and have a clearly defined purpose, the application is easier to manage and understand. Here are a few key benefits of using a microservice-based architecture:
- Scalability is easy, as you can think of the whole system as a collection of services, each interfacing with other microservices. This allows you to scale up, down, or out based on the resources needed by individual microservices instead of the entire application (i.e., monolithic architecture).
- Simplified developer experience so that a new developer joining the team does not have to understand the entire system but only the context of the service they are working on. This improves productivity as they can focus on a single code base and its functionality.
- Platform independence and flexibility so that developers can choose the best tools for the job when building services for the system.
Drawbacks of microservice architecture
Microservices aren’t a great tool for all scenarios, and in some cases, monolithic architectures can be more efficient. For instance:
- If not architected correctly, there is a risk of getting an overly fragmented system where developers need to spend time and effort gluing together services and tools.
- Monitoring microservice-based architectures is more complex since there are multiple points of failure across the system. This also increases testing complexity.
- Orchestration, which is the integration of the multiple services into a full-fledged application, and discovery, which is how applications and microservices locate each other on a network, must be architected from the get-go.
How to build microservices with Node.js
Node.js has become a popular language for enterprises and startups who want to embrace microservices. There are several reasons why:
- Improved execution time - The V8 JavaScript engine that powers Node.js compiles functions written in JavaScript to native machine code. This makes Node.js a popular choice for building microservices that carry out low-latency CPU and IO-intensive operations.
- Event-driven architecture - Most of the objects in Node.js provide a way to emit and listen to events making it highly beneficial in building event-driven apps.
- Asynchronous and non-batch - Most Node.js libraries support non-blocking calls which continue execution without waiting for the previous call to return. Additionally, data is returned as-is, streamed as chunks, and not batched in a buffer.
- Scalable technology - The Node.js execution model supports scaling by delegating request handling to other worker threads.
Building Microservices with Node.js
Prerequisites and initialization
To follow along and get the most out of this hands-on tutorial, familiarity with JavaScript and basic knowledge of HTTP requests is essential. We’re going to model a real-world microservice using Node.js consuming an external API, ZipCodeAPI.com.
To get started, you need to ensure you have Node.js installed. If you do not have it installed, follow the instructions in the Node.js documentation.
In your terminal:
1. Create a directory called microservice, and go into that directory.
2. Then use npm to get the required dependency packages (Express and Request). Express is a backend framework for Node.js and Request is the package that will enable you to communicate with the external API.
To install the packages in your terminal, execute the following command:
npm i express request --saveThe i is an abbreviation for install, and the --save attribute enables the packages to be added as dependencies in the package.json file. Although the later versions of npm packages are added automatically, it's still safe to include the --save.
An additional package npm produced is the node_modules. It is a directory that houses the external modules that your project needs.
Setting up the server
From the tree structure of our project above, create an entry file called server.js that will be executed when our server is started. In the server.js add the code below:
const express = require('express');
const app = express();

const routes = require('./api_routes/routes');
routes(app);
const port = process.env.PORT || 3000;

app.listen(port, () => {
console.log(`Listening to port http://localhost:${port}`);
});
We make the routes available in our primary file by requiring it and passing the app instance into the routes object. In the next step, we will show how to define the routes file. When the server is run, the app will start listening on port 3000 or any other port specified in the PORT environment variable.
Specifying the routes
In our api_routes folder, we create a file called
routes.js and add the code below to it:'use strict';
const controller = require('../controllers/controller');
module.exports = (app) => {
app.route('/about').get(controller.about);
app.route('/distance/:zipcode1/:zipcode2').get(controller.getDistance);
}The routes file specifies our two endpoints : /about and /distance/:zipcode1/:zipcode2.
The /about endpoint will specify the application details.
The /distance endpoint will be used to compute the distance in miles between zipcode1 and zipcode2 using the external API returning the distance between the two ZIP codes for us. The implementation of these endpoints is in the controller file, which we’ll get into in the next step.
Building the controller
A controller object in Node.js interprets user intent and handles requests received by the routes module created earlier.
'use strict';

const properties = require('../package.json');
const distance = require('../service/distance');

var controllers = {
    about: (req, res) => {
        var aboutInfo = {
            name: properties.name,
            version: properties.version,
        }
        res.json(aboutInfo);
    },

    getDistance: (req, res) => {
        distance.find(req, res, (err, dist) => {
            if (err)
                res.send(err);
            res.json(dist);
        });
    },
};

module.exports = controllers;
The controller file has two functions,
about() and getDistance().The about function accepts two arguments, a request-response pair. The name and version values are stored in the package.json properties.
The
getDistance() function also has two arguments, a request and response pair. It calls the find API defined in the services folder.Establishing the call
For us to make the API call, we’ll use the third-party API, ZipCodeAPI.com. You can register for an account and get a free API key. You can also choose to use the test API key in the example, although it expires after some hours.
For this example, we have stored the API keys and
zipCodeURL in an environment variable and called them ZIPCODE_API_KEY and ZIPCODE_API_URL, respectively.So let’s go ahead and construct our microservice with the code below:
const request = require('request');

const apiKey = process.env.ZIPCODE_API_KEY ||
    "hkCt1nW1wF1rppaEmoor7T9G4ta7R5wFSu8l1dokNz8y53gGZHDneWWVosbEYirC";

const zipCodeURL = process.env.ZIPCODE_API_URL;

var distance = {
    find: (req, res, next) => {
        request(zipCodeURL + apiKey +
            '/distance.json/' + req.params.zipcode1 + '/' +
            req.params.zipcode2 + '/mile',
            (error, response, body) => {
                if (!error && response.statusCode == 200) {
                    response = JSON.parse(body);
                    res.send(response);
                } else {
                    console.log(response.statusCode + response.body);
                    res.send({
                        distance: -1
                    });
                }
            });
    }
};

module.exports = distance;
We first load the request package to process the external HTTP request, and then load the API Key and zipCodeURL from the environment variable.
In the
find() function, we construct a request object and specify a callback function to call when the response is received. If our function has no errors and the response has an HTTP status 200, which means it’s a success, the body of the response is parsed and returned. If there are any failures, they are logged to the console, and the response of -1 is returned.Execution
If you have arrived at this step successfully, you should be able to execute the program by running
npm start in the terminal of your project.If everything runs smoothly, you should be able to hit the
/about web endpoint of the project and see an output like below in a web browser.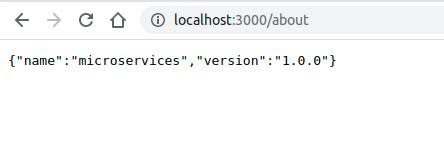
Similarly, hitting the
/distance endpoint and passing it some values in the query string should produce an output as shown in the screenshot below.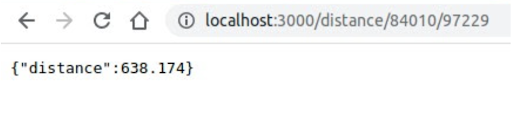
That pretty much sums up how to build and use a microservice to find the distance between two ZIP codes.
Incorporating a database into your architecture
So, you’ve built your Node.js application and now need to store data in a database. Typically, a database or Data API is used for this purpose. By using a JavaScript driver, you can seamlessly interact with your databases from within your Node.js application.
For example, installing Fauna’s JavaScript driver with npm is as simple as executing a single line of code from your system terminal.
$ npm install --save faunadbYou can also check out examples of how to use this driver in the Fauna docs.
Try Fauna for Free
Sign-up for free
The data API for modern applications is here. Sign-up for free without a credit card and get started instantly.
Sign-up now
Quick start guide
Try our quick start guide to get up and running with your first Fauna database, in only 5 minutes!
Read more
If you enjoyed our blog, and want to work on systems and challenges related to globally distributed systems, serverless databases, GraphQL, and Jamstack, Fauna is hiring!
Subscribe to Fauna's newsletter
Get latest blog posts, development tips & tricks, and latest learning material delivered right to your inbox.